Draping


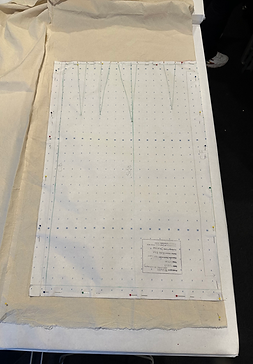
In my Applications of Costuming class I learned and practiced draping techniques. I draped muslin fabric on a dress form which I would mark up and label. I would transfer all the marks, edges, and measurements to pattern paper and turn it into a pattern. To make positive my pattern was correct I would cut the pattern out of another piece of muslin and sew it as a garment. For the first project I draped and sewed a skirt. I went through the full process of creating the garment, attaching facing to the waist and serging the edges to finish. The center back seam was a little tight when I put it back on the dress form, but I easily fixed the pattern and restitched it. It was good practice on how to alter patterns and why you should add ease when draping.


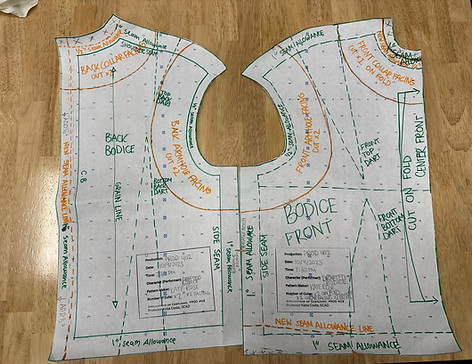
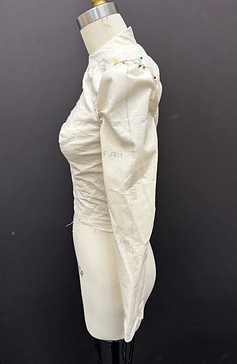
The next draped garment I made was the bodice. There were very long darts to make the curved shape of the bust. Because I draped the fabric the darts were curved, fitting the shape of the dress form more naturally than a straight lined dart. The mockup I made out of the pattern fitted very well, almost too well again. Part of the reason was that the seam allowance was still on there, as seen in the neckline in the photo. But when I went back and added facing that took the seam allowance away a neck and armholes went to their correct size. The facing pattern was put on the same pattern paper as the bodice ,which I marked with all the seam allowance, darts, new center back line from fitting, and other information. Once I knew the basic bodice block I was able to explore and design different shirt patterns.


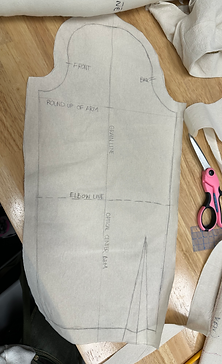
For the draped sleeve block I practiced on a padded roll that was meant to be a fake arm. I could take the same measurements and pin the fabric as if it were part of a dress form or of a body. For a sleeve the elbow and upper arm line were important to note. I transferred the draping markings to pattern paper and made a mock up like the others. I sewed basting stitches around the armscye curve to gather the top of the sleeve. Then I fitted the sleeve, checking the amount of gathering needed, pinning it to the bodice mock up. I was unsure if they would match as they were not based off of the same mannequin or body but it only took a little gathering which is normal for any sleeve. The amount of gathering and puffiness at the top of the would depend on what style of sleeve you wanted.


My favorite draping project we did in this class was a ballet bodice. The multiple vertical seams were unique and hugged the dress form well. The ballet bodice has interesting points at the top of the bust and at the center front waist line but curves down in the back. All which make the shape of a bodice known for being used by dancers. I had to make sure each pattern piece was pinned together tightly to get the organic shape. When I took the pattern pieces off I found that they made very unique and unexpected shapes. That is the beauty of draping as separate pieces that look mismatched come together to lay beautifully over a form. After doing these draping projects I became excited to try making more garments using this method.


